Coyote Mustang Swap
Putting a New 5.0L into a 1966 Mustang
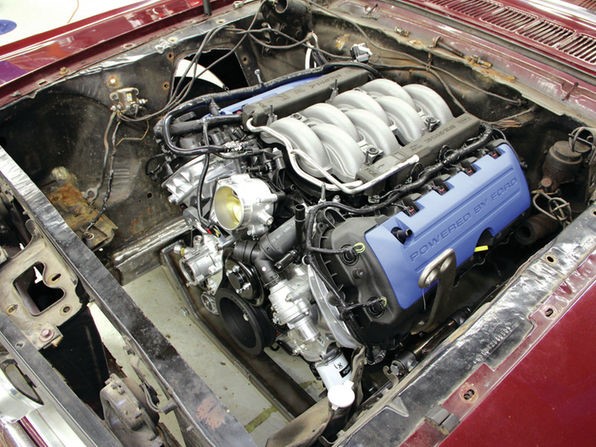
The coyote engines are very wide and the engine compartment of early Mustangs too narrow.
Those times are changing, as aftermarket companies like Heidts Hot Rod & Muscle Car Parts develop new front- and rear-suspension systems designed for your favorite street machine. The company recently released the Pro-G front-suspension kit for 1964–70 Mustangs. It is a completely new, dual-crossmember subframe that replaces the car’s stock suspension, brakes, and steering. It requires the shock towers to be removed and the parts welded in place.
The Coyote!
For the money, you get an aluminum block and heads, forged steel crank, forged rods, and hypereutectic aluminum pistons. The factory rating is 435-plus horsepower and 400+ lb-ft, but we’ve seen Mustangs making these numbers at the rear wheels. With headers and some tweaking, no problem.
| PARTS LIST
5.0 Coyote Engine Brake Flexline Kit Front Runner Master Cylinder Pro -G Front Swap Bar |
|||
- The car is a ’66 Mustang convertible with a six-cylinder engine and an automatic transmission. The goal is to make it act as much like a new car as possible while maintaining the classic look.
- This is the Heidts Hot Rod & Muscle Car Parts base kit without the brakes. There is an option for a sway bar, and if you are a drag racer, the suspension can be ordered with 8 degrees of positive caster to keep the wheels going straight.
- Engine nice for a light car like this Mustang.
- The frame needs to be cleaned where it is to be welded. Boxing plates are provided in the kit and can be MIG-welded to the front subframe. The key to this job is getting the plates square in the car. The upper plate should be tacked in place 18 inches from the radiator core support.
- This kit requires that you cut everything off the front subframe of the car, including the factory shock towers. To expedite things, a Tomahawk Plasma Cutter was used.
- Bend the 1⁄8-inch lower plate to match the lower curve of the framerail. The boxing plates not only strengthen the frame, but they also create a flat surface to connect the Heidts crossmembers.
- With the boxing plates in place, Grant tacked them to the subframe and to each other.
- The crossmember needs to be square in the car. To achieve that, we marked the spindle centerline (center of the crossmember upper control-arm mount) with Steel Red layout fluid and a scribe and referenced it to the door gap, making sure both the marks and the reference points were the same on both sides of the car.
- We also ensured that the crossmember was equal distance from the outside of the subframe.
- After the plates were tacked, Grant TIG-welded the plates to the front subframe using a Lincoln 225 Precision TIG, making sure to weld in sections to avoid warping the metal.
- double-check the measurements against the radiator core support on both sides before going near the welder.
- Using a set of spacers from the kit, tacke the rear then the front crossmembers into place and rechecked the measurements.
- After being sure that everything was in the correct position, some MIG beads using a technique called stitching, which interconnects small sections of the weld in order to avoid overheating and warping the metal.
- Every seam was welded, connecting the crossmember to the subframe.
- Using the scribe mark, Grant centered and welded the upper shock mounts to the Mustang’s subframe and top side of the crossmember.
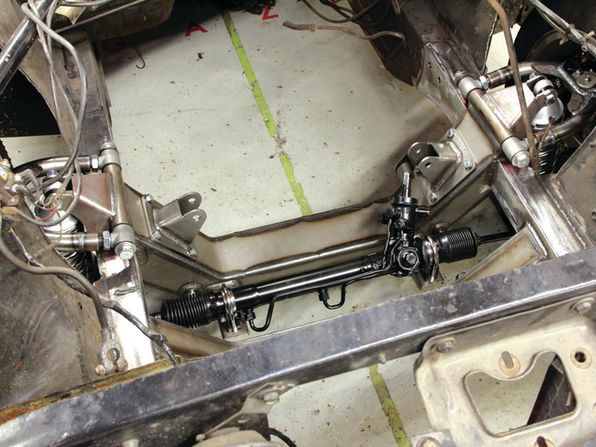
- This is a new power-steering rack from a 2000-and-later Ford Mustang. It bolts directly to the crossmember and clears the stock Coyote pan.
- Before we attached any suspension components, we centered the steering rack by counting the turns, lock-to-lock, and dividing it by two and returning it to that point. This allowed us to rough-in the toe so both wheels were straight.
- The kit includes both the upper and lower control arms and the hardware to install them.
- The lower portion of the coilovers need to be swapped, from trunion to bushing mounts. Coating the threads with anti-seize makes them easier to adjust after the weight is on the car. The spring seat is used to set ride height after the car is assembled. A good starting point is one half-turn after the spring seat contacts the coil spring.
- The Wilwood hubs need to be assembled before installation. Torque for the wheel studs is 77 lb-ft, and the seal needs to be installed with a driver.
- The hub and brake caliper mounting bracket mount to the spindle. To set the bearing preload, tighten the castle nut to 12 lb-ft while turning the rotor assembly forward by hand. Back off the nut until there is 0.001–0.005 inches of endplay, or just after the rotor begins to rock.
- When the lower control arms are level, the suspension travel is at the midpoint. This is where you should install the coilovers. The kit comes with a 450-pound spring and single-adjustable shocks. When the engine is in the car, and the car is in the ground, the alignment angles are 4–6 degrees positive caster, 1⁄2–1 degree negative camber, and 1⁄8-inch toe-in.
- This kit came with a Wilwood 12.88-inch-diameter vented rotors and 6-piston calipers. Way too much for this tiny car, but sometimes a little overkill is OK.
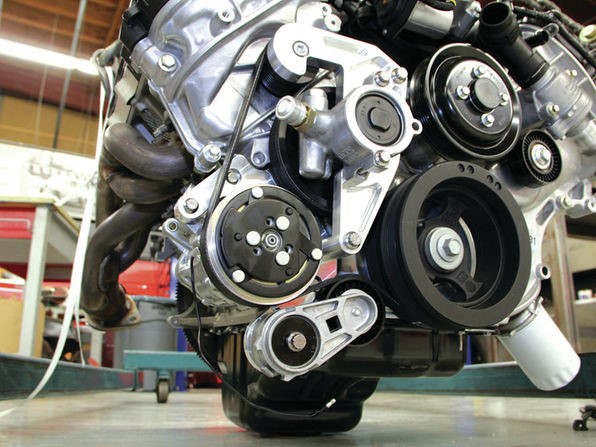
- Before you can drop the engine in, there is one more thing. The Ford Mustang GT has electric steering instead of hydraulic that we are used to. The steering rack requires a hydraulic pump to operate. The solution is a Front Runner from Vintage Air.
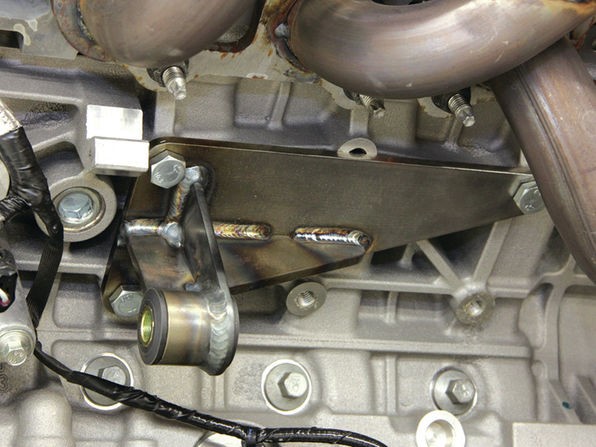
- The Front Runner for the Boss/Coyote engine has what you need to run both a hydraulic steering system and A/C. It requires cutting off a portion of the block and drilling and tapping a factory hole, but the alternative is manual steering.
- The engine-mount brackets simply bolt to the new front crossmember. Heidts sells a kit to mount either the stock or aftermarket steering column to the rack.
- The Heidts kit also comes with new fabricated engine mounts. The rubber bushing acts as a vibration damper.
- A 4R70W Transmission for mild swaps like this one. It bolts to the back of the engine and fits in the car without modification to the floorpan. The kit comes with everything you need, including a flexplate and torque converter.
- engine in the car. A lot of work ahead to get this to run, but the basics like engine mounts, suspension, steering, and engine controls—thanks to the Ford Racing Controls Pack—are in place. We are going to need a fuel system, radiator, steering column, cold air, and an intake.